


Record filtering
TweetRecord filtering is a useful way to show only the data that you want displayed. By applying a filter, you are able to limit the data in a report without altering the content of the underlying table/sheet. In this article we’ll show how you can use record filtering for building fully featured business solution for collecting and sharing CVs through your web site.
In whole honesty, we can use dbBee for collecting and sharing the data online even without record filtering, but only with this feature we can build professional solution with maximum efficiency.Let us explain. Without record filtering you have no control over the data that will be displayed to your web site visitors, meaning that if data exist in your table/sheet it will be shown. And if you use the same table/sheet both for adding data to your database and for sharing it with your visitors, you risk to show inappropriate content on your site, since someone can deliberately and maliciously add fake data, spam or even various insults to your database.
On the other hand, if you choose to use two tables/sheets, one for collecting data from your visitors and the other for presenting (sharing) those with your visitors, you will have additional work to copy/paste records from one table/sheet to the other, let alone wasting a lot of your time.
To build complete solution with record filtering we need 3 types of dbBee projects. First we will build "collect data” project, to allow our visitors add data to our database. Second, we need "query->browse->detail” project to let our visitors search and browse data we collected. And, finally, we need an "administration” project that will allow us check and verify records added by our visitors.
The following picture shows our Excel sheet prepared for dbBee
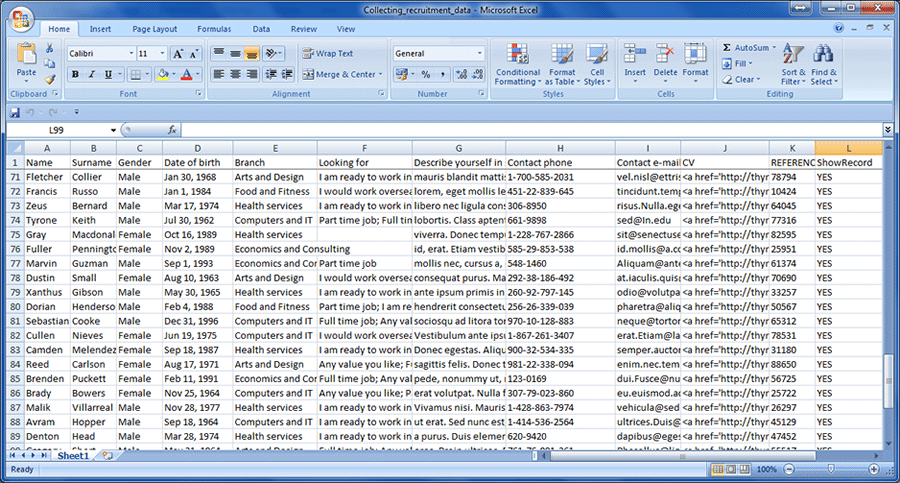
You can see that besides data about candidates, we also have a column named "ShowRecord”, filled with same value – word "YES”. This is the field we’re going to use for record filtering.
As mentioned earlier we need three dbBee projects to build complete solution for collecting and sharing data about job seekers. Naturally, since we have to collect some data first, we’ll start with "collect data” wizard. In this article we will focus on record filtering. Detailed video tutorial about "collect data” wizard can be found here.
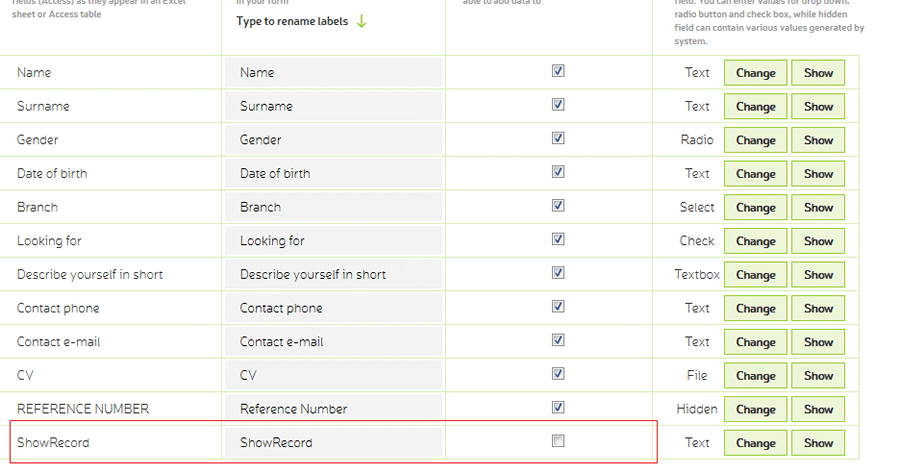
On the image below you can see that we selected all fields but "ShowRecord” to be included in web form for collecting data.
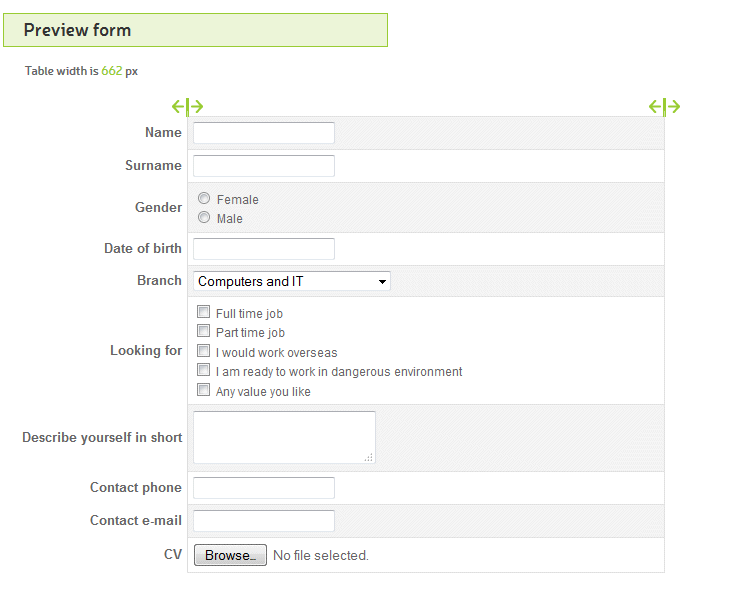
And here’s the final look of our form:
You’ll notice that there’s no place for visitor to add value for "ShowData” filed. This means that newly added records will have no value in column "ShowData”. Form also does not show field "REFERENCE NUMBER” but do not be confused by that, it is set as "HIDDEN” type, and will use the value generated by system.
Once our visitor adds the data to the database, our sheet will look like this:
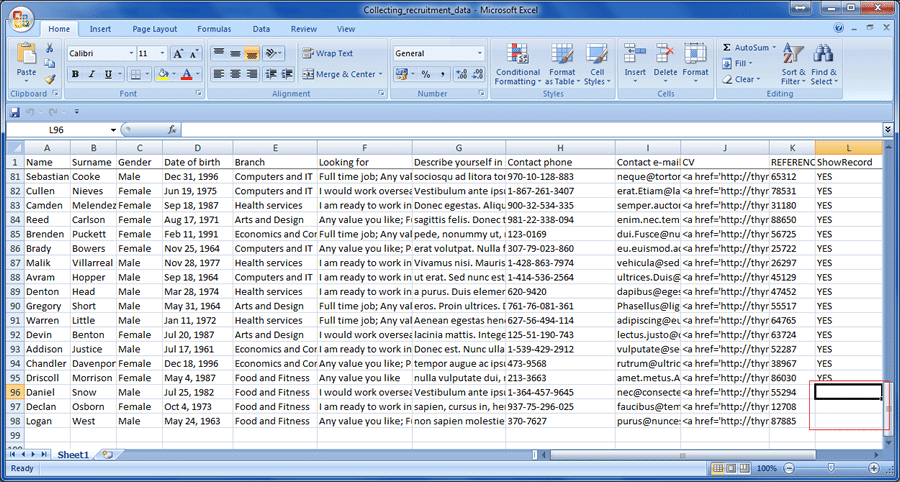
Please note that three last records have no value in "ShowRecord” column (marked red).
Now we have to build "query->browse->detail” dbBee project to enable our visitors browse through our database. Again, we’re not going to explain how to use "query->browse->detail” wizard which is explained here, but we’ll focus to defining proper filter value.
Next image shows "Define record filtering” section:
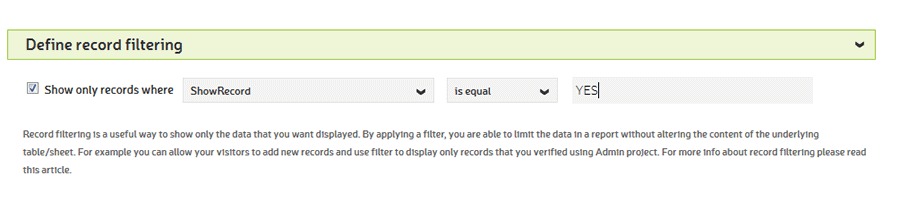
On the image above you can see how we set the filter to display only records that have word YES in column "ShowRecord”, and if you remember, we skipped adding that field to collect form, so newly added records will have no value in this column, and therefore will not be displayed to visitors that browse our database. This way we protected our system from being abused by malicious users, as well as from involuntary mistakes of regular users.
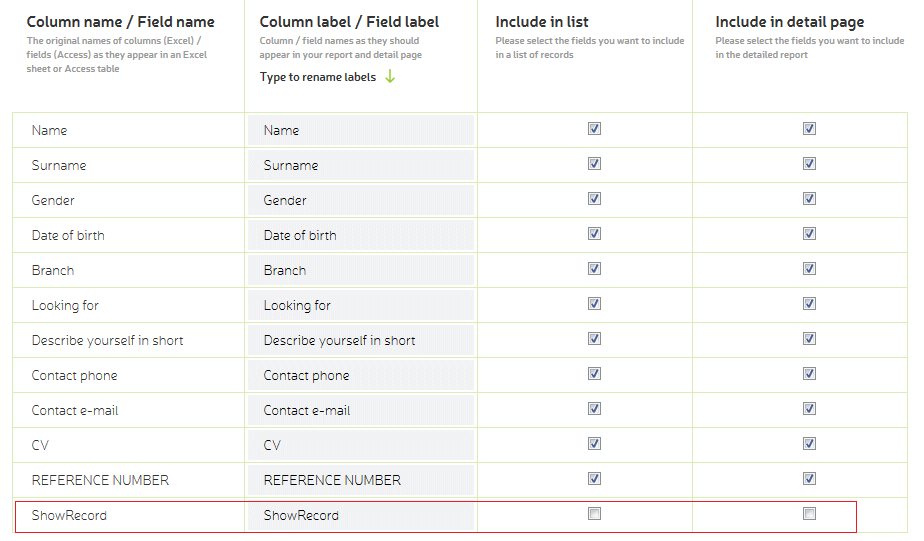
We do not need to show the field we used for record filtering in our report (see the next picture):
However, setting this filter also means that visitors will not see any newly added records, even the correct ones.
For that we need to build "Admin” dbBee project that will allow us to preview, correct and modify newly added records, and to add value (in this case word YES) to filed "ShowRecord”, so it becomes visible to visitors that browse the database.
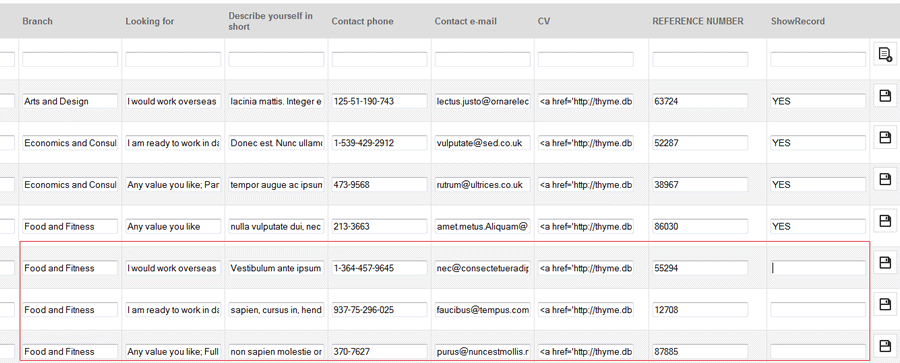
Next image shows our "Admin” project with newly added records marked with red box:
To make these records visible to our web site visitors, we only need to type word YES in empty form field, and save the record.
As you can see from this example, record filtering is very simple to use, yet very powerful feature that significantly increases usability of your dbBee projects.